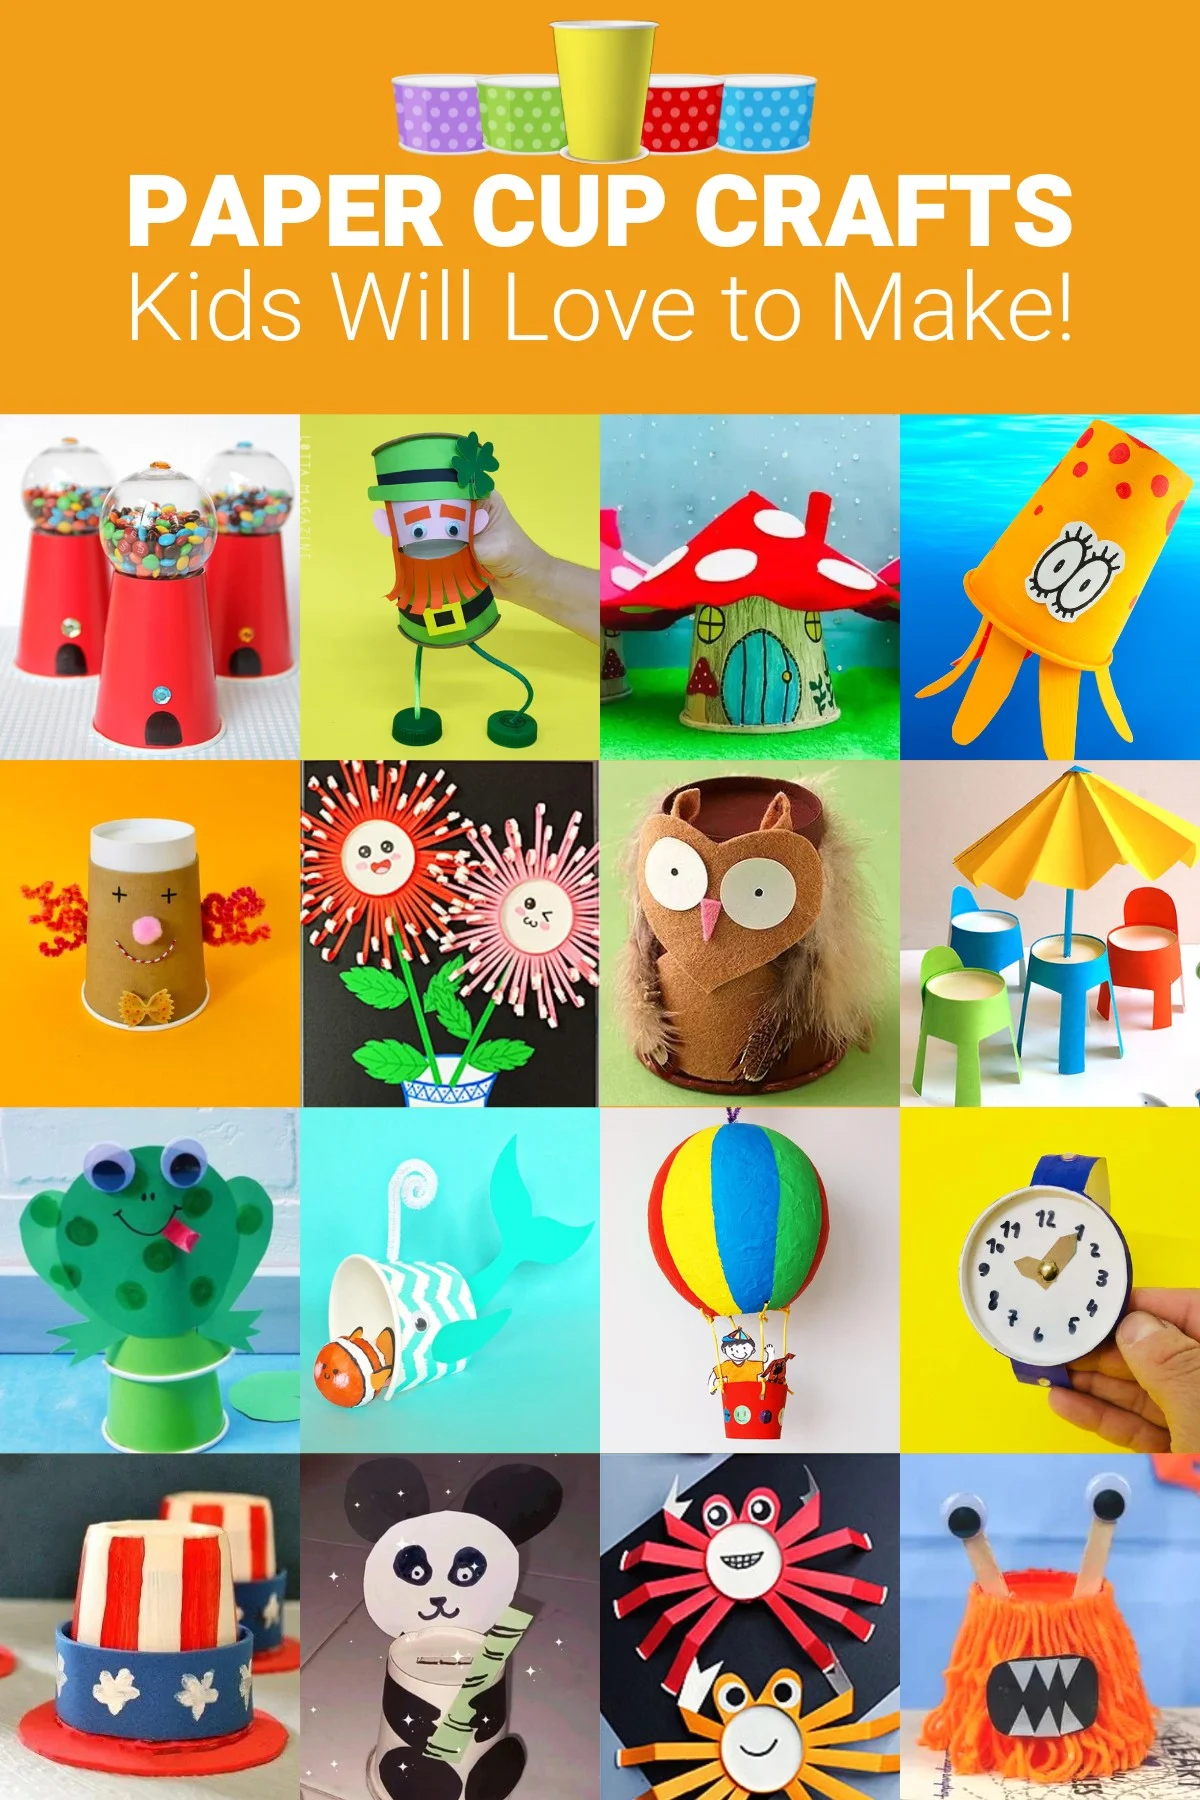
Crafts That Care: 5 Sustainable DIY Ideas for a Greener Home
In a world increasingly conscious of its environmental footprint, the desire to create a more sustainable living space is gaining momentum. Beyond the large-scale initiatives, individual actions, especially those born from creativity and a touch of DIY spirit, can weave a powerful tapestry of change. “Crafts That Care” isn’t just about making things; it’s about making a difference. It’s about transforming discarded materials into functional art, reducing waste, and infusing your home with a sense of purpose and eco-conscious charm.
This isn’t about a drastic overhaul; it’s about embracing accessible, impactful projects that speak to a gentler way of living. We’re moving beyond the purely aesthetic and delving into creations that actively contribute to a greener home, breathing new life into forgotten items and fostering a deeper connection with the resources we use.
The Philosophy of “Crafts That Care”
The core of “Crafts That Care” lies in intentionality. Each project is designed to:
- Reduce Waste: Divert materials from landfills and give them a second, often more beautiful, life.
- Promote Circularity: Embrace the principles of upcycling and repurposing, closing the loop on material consumption.
- Conserve Resources: Minimize the need to purchase new items, thereby saving energy, water, and raw materials.
- Foster Mindfulness: Encourage a slower, more deliberate approach to consumption and creation.
- Enhance Home Aesthetics: Prove that sustainability can be both beautiful and functional.
Let’s explore five creative and unique DIY ideas that embody this philosophy, turning your home into a sanctuary of conscious living.
5 Sustainable DIY Ideas for a Greener Home
1. The “Whispering Weave” Fabric Scrap Rug
Concept: Transform worn-out clothing, linens, or fabric scraps into a vibrant and durable rug. This project breathes life into textiles that would otherwise be discarded, adding a unique, tactile element to your floors.
Materials:
- Old T-shirts, sheets, jeans, or any fabric scraps
- Sharp scissors or rotary cutter
- Optional: A large crochet hook or knitting needles (for more structured weaving)
- Optional: A sturdy base material like old burlap or a non-slip rug pad
The Craft:
- Preparation is Key: Cut your fabric scraps into long, uniform strips. The width will depend on the desired look and the type of fabric. Thicker fabrics might require wider strips for a more robust weave.
- The “Rag Rug” Technique: There are several methods. A simple no-sew approach involves knotting the strips together, then braiding or coiling them into a rug shape. For a more polished look, consider latch-hooking strips onto a mesh canvas or using a large crochet hook to loop them through a foundation of sturdier material.
- Weaving Your Story: As you weave, mix and match colors and textures to create a truly unique piece. The imperfections are part of its charm, a testament to its origin story. Consider incorporating sentimental pieces of clothing for an added layer of meaning.
- Finishing Touches: Once your desired size is reached, secure the ends to prevent unraveling. If using a base, attach the woven fabric securely.
Why it Cares: This project is a champion of textile recycling, tackling a significant waste stream. It also reduces the demand for mass-produced rugs, often made with synthetic materials.
Impact Snapshot:
| Resource Saved | Material Diverted | Time Investment | Skill Level |
|---|---|---|---|
| New Rug Purchase | Old Clothing/Linens | Moderate | Beginner |
| Synthetic Fibers | Fabric Scraps | ||
| Water (Manufacturing) |
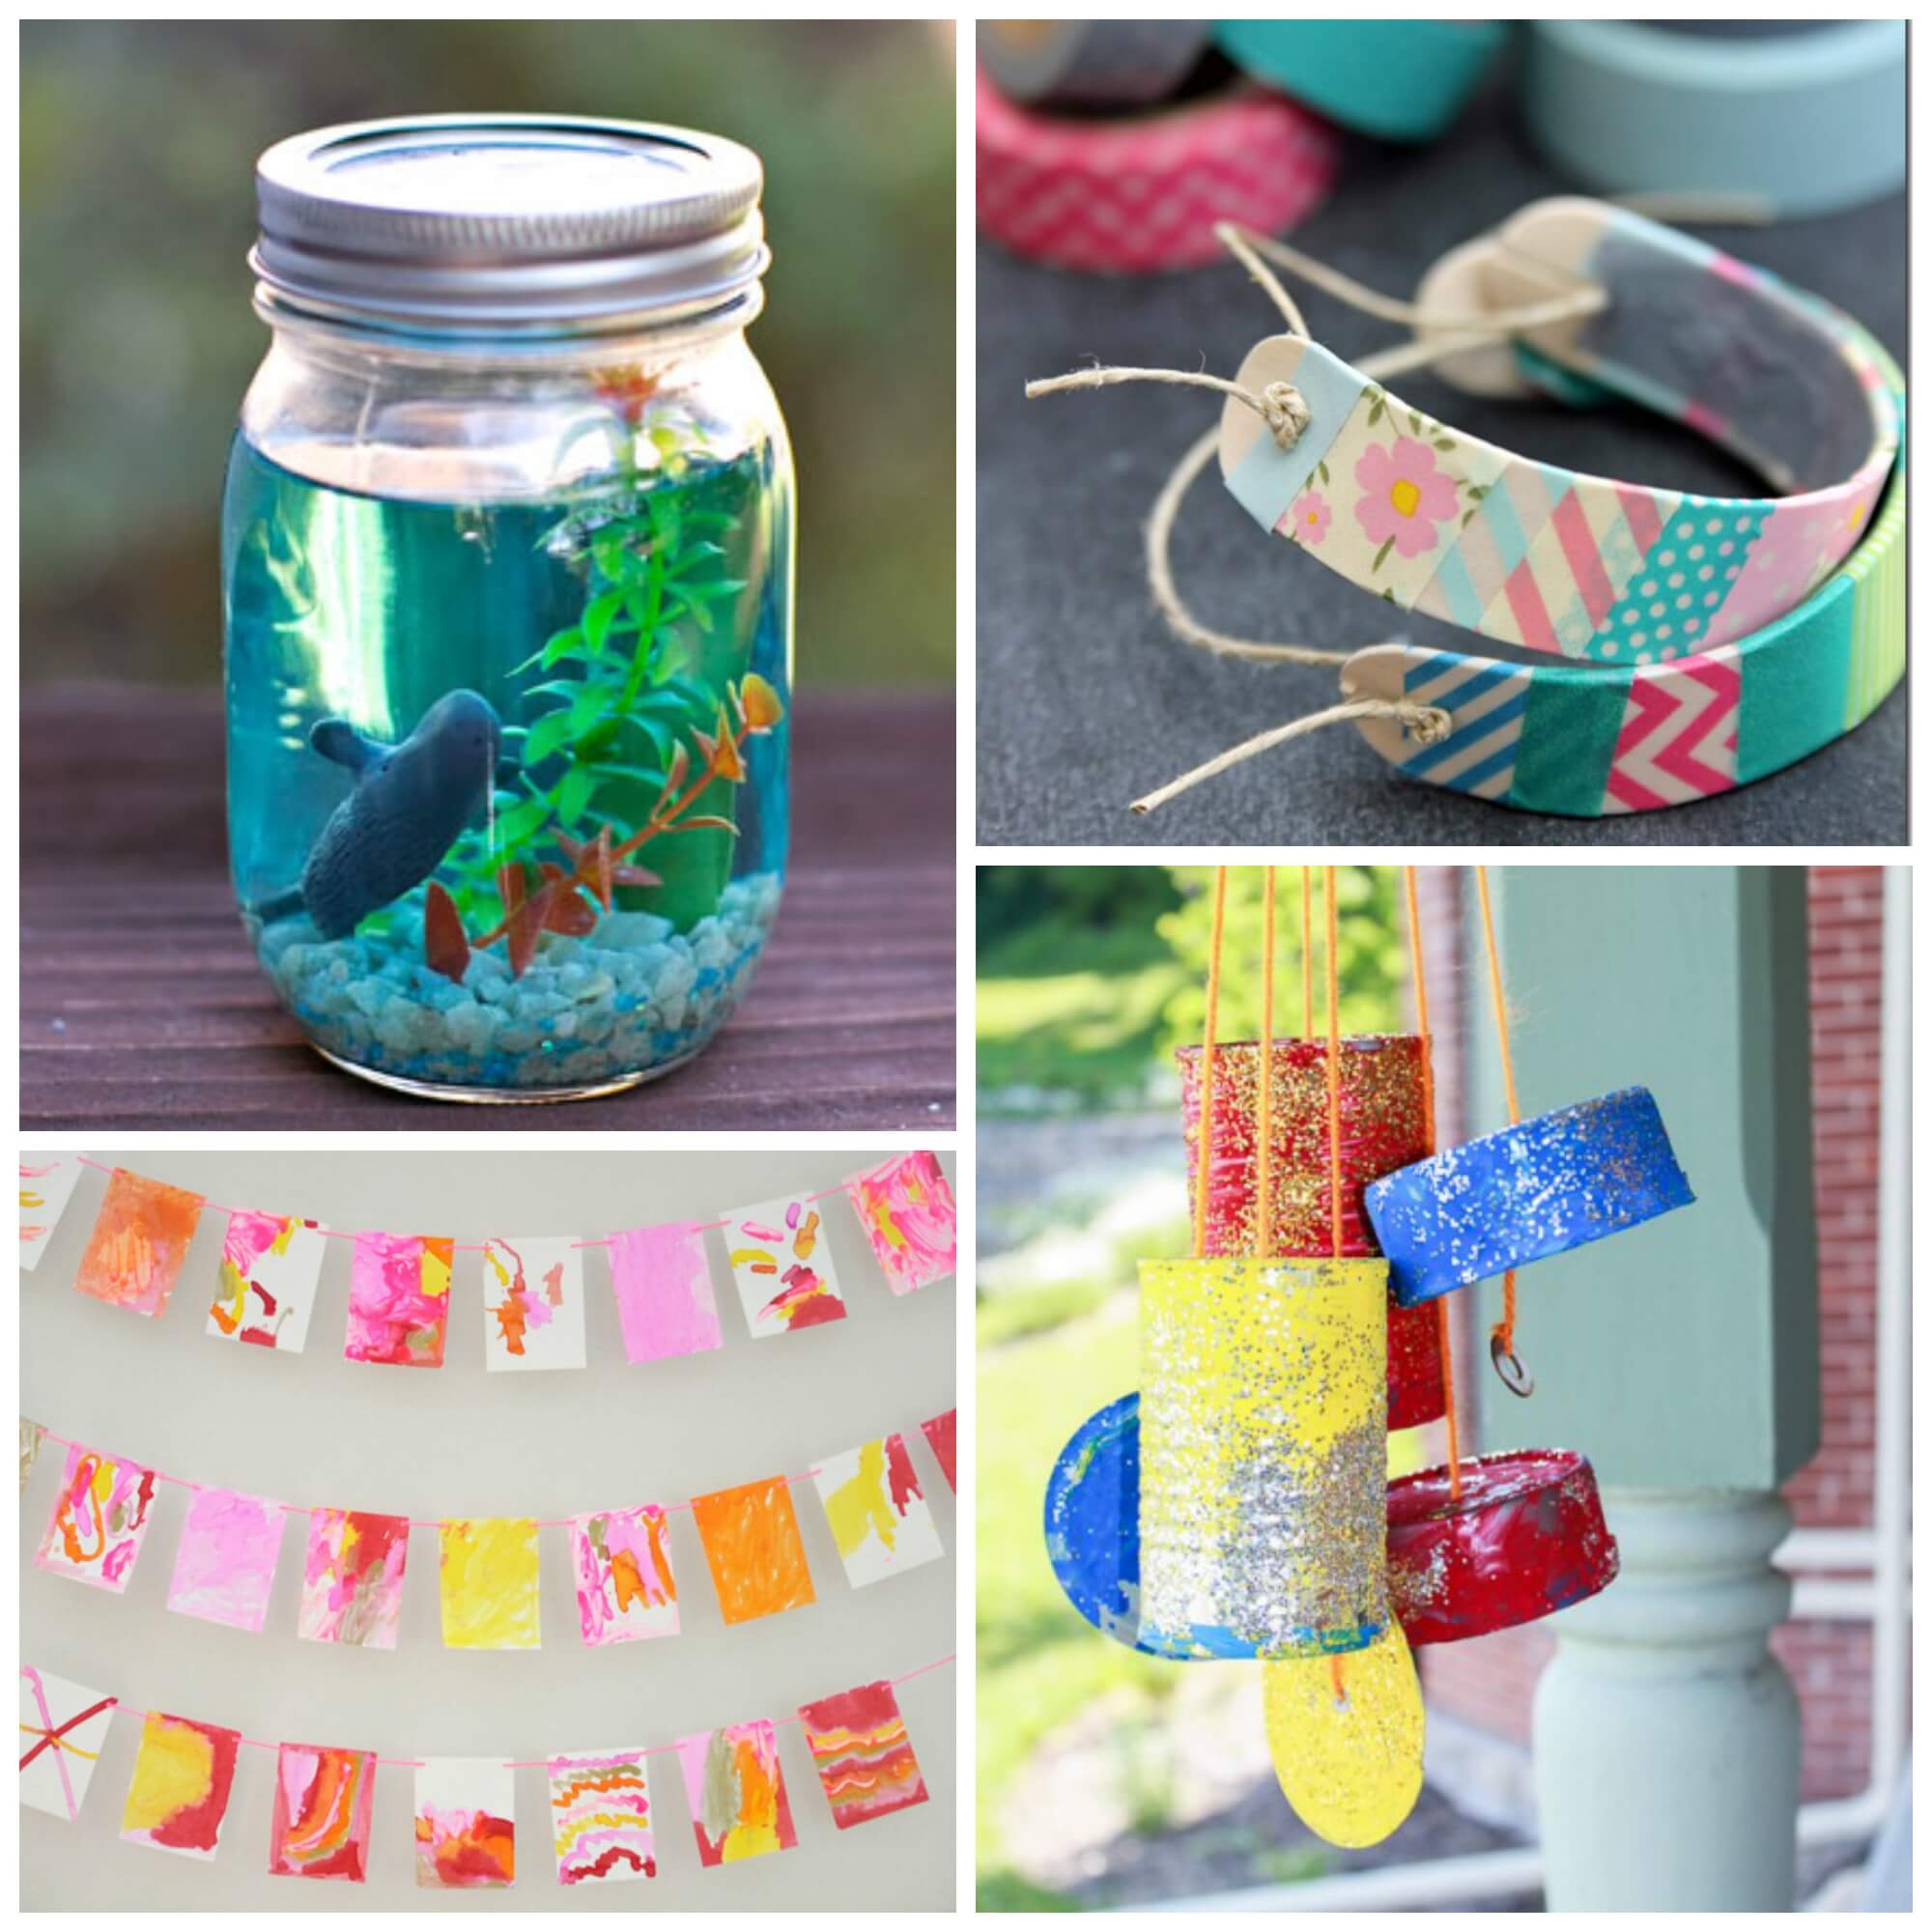
2. “Bottled Brilliance” Upcycled Jar Lanterns
Concept: Give old glass jars a second life as enchanting lanterns, casting a warm and inviting glow. This project is perfect for those evening gatherings or adding a touch of ambient light to your living space.
Materials:
- Clean glass jars (various sizes and shapes)
- Optional: Twine, jute, or thin wire
- Optional: Paint (acrylic, chalk paint) or decorative stencils
- Optional: Small stones, beads, or dried flowers
- LED tea lights or battery-operated fairy lights (for safety)
The Craft:
- Clean Canvas: Thoroughly wash and dry your glass jars. Remove any labels – a soak in warm, soapy water usually does the trick.
- Embellish with Intent: This is where creativity shines.
- Rustic Charm: Wrap twine or jute around the neck of the jar and secure it. You can also create a handle from wire.
- Painted Panache: Use stencils to paint intricate designs, or opt for a solid coat of paint for a more modern look.
- Natural Accents: Glue small stones, dried flowers, or even colorful beads to the exterior of the jar.
- Illumination Station: Once your decorations are dry, place an LED tea light or a string of battery-operated fairy lights inside. Always use LED lights for safety, as traditional candles can pose a fire risk with decorative embellishments.
Why it Cares: This transforms glass waste into decorative lighting, reducing the demand for new lamps or candles. It’s also a fantastic way to repurpose common household items.
Impact Snapshot:
| Resource Saved | Material Diverted | Time Investment | Skill Level |
|---|---|---|---|
| New Lighting | Glass Jars | Low | Beginner |
| Decorative Items |
3. The “Seed to Sanctuary” Vertical Herb Garden
Concept: Create a space-saving vertical garden using repurposed pallets or even old gutters to grow your own herbs. This brings fresh flavors to your kitchen while reducing your carbon footprint.
Materials:
- Wooden pallet (untreated is best) or old gutters
- Landscape fabric or sturdy plastic sheeting
- Staple gun and staples
- Potting soil
- Herb seedlings or seeds
The Craft:
- Pallet Prep (if using): If using a pallet, ensure it’s clean and free of loose nails. You may want to lightly sand it.
- Creating Pockets:
- Pallet: Staple landscape fabric to the back, bottom, and sides of the pallet’s slats, creating individual pockets for soil.
- Gutters: If using gutters, drill drainage holes along the bottom. You can then stack them vertically using brackets or attach them to a wall.
- Planting Paradise: Fill the pockets or gutters with potting soil. Plant your chosen herb seedlings or seeds, ensuring they have enough space to grow.
- Nurturing Nature: Place your vertical garden in a location that receives adequate sunlight. Water regularly, ensuring good drainage to prevent root rot.
Why it Cares: This project promotes food sustainability by allowing you to grow your own herbs, reducing transportation emissions and packaging waste. It also repurposes materials that might otherwise end up in landfill.
Impact Snapshot:
| Resource Saved | Material Diverted | Time Investment | Skill Level |
|---|---|---|---|
| Fresh Produce Costs | Wooden Pallets/Gutters | Moderate | Intermediate |
| Packaged Herbs | |||
| Food Miles |
4. “Paper Petals” Recycled Newspaper Wall Art
Concept: Transform old newspapers and magazines into beautiful, textured wall art. This project is a fantastic way to add a unique, artistic statement to your home while giving paper waste a new purpose.
Materials:
- Old newspapers and magazines
- PVA glue (white craft glue)
- Water
- A sturdy backing material (cardboard, canvas, or even a repurposed wooden board)
- Optional: Acrylic paints or other decorative elements
The Craft:
- Paper Pulp Preparation: Tear newspaper and magazine pages into small pieces. Soak them in water for several hours or overnight until they become soft.
- The Pulping Process: Blend the soaked paper with a small amount of water until you achieve a pulp-like consistency. You can use a blender for this, but dedicate it solely to craft projects.
- Adhesive Blend: Mix the paper pulp with PVA glue. The ratio will vary depending on the desired thickness and adhesion, but start with roughly equal parts pulp and glue and adjust as needed.
- Artistic Expression: Spread or mold the pulp mixture onto your backing material. Create abstract designs, intricate patterns, or even three-dimensional shapes. Let your imagination guide you.
- Drying and Finishing: Allow the artwork to dry completely. This can take 24-48 hours, depending on the thickness. Once dry, you can paint over it with acrylics, add glazes, or leave it with its natural paper texture.
Why it Cares: This project diverts a significant amount of paper waste from landfills and reduces the need to purchase new decorative art pieces.
Impact Snapshot:
| Resource Saved | Material Diverted | Time Investment | Skill Level |
|---|---|---|---|
| New Wall Art | Newspapers/Magazines | Moderate | Intermediate |
| Craft Supplies |
5. “Tire Terrors Transformed” Planters
Concept: Give old tires a surprising and stylish second life as durable and striking planters for your garden or balcony. These are built to last and add a touch of industrial chic to your outdoor space.
Materials:
- Old tires (ensure they are clean and free of excessive dirt)
- Heavy-duty paint (exterior-grade spray paint or acrylics)
- Primer (optional, but recommended for better adhesion)
- Brushes or rollers
- Optional: Stencils for decorative patterns
The Craft:
- The Clean Slate: Thoroughly clean the tires with soap and water to remove any grease or grime. Allow them to dry completely.
- Color Coating: Apply a coat of primer if desired, especially if you want vibrant colors. Then, apply your chosen exterior-grade paint. You can go for a single bold color, a multi-tone effect, or use stencils to create patterns. Multiple thin coats are usually better than one thick coat.
- Placement and Planting: Once the paint is completely dry, place your transformed tire planters in your desired location. Fill them with soil and plant your favorite flowers, vegetables, or small shrubs.
Why it Cares: This is a powerful example of upcycling, taking a bulky waste item like a tire and turning it into a functional and attractive garden feature. It prevents tires from languishing in landfills.
Impact Snapshot:
| Resource Saved | Material Diverted | Time Investment | Skill Level |
|---|---|---|---|
| New Planters | Old Tires | Moderate | Beginner |
| Garden Decor |
Weaving a Greener Future, One Craft at a Time
These “Crafts That Care” are more than just DIY projects; they are small acts of rebellion against a disposable culture. They are invitations to see the potential in what we often overlook, to embrace creativity as a tool for positive change, and to build a home that not only reflects our style but also our commitment to a healthier planet.
By engaging in these sustainable crafts, you’re not just decorating your home; you’re contributing to a larger movement. You’re proving that a greener lifestyle can be beautiful, accessible, and deeply rewarding. So, gather your materials, unleash your creativity, and start crafting a future where care for our planet is woven into the very fabric of our lives.

Additional Information
It’s great you’re interested in “Crafts That Care: 5 Sustainable DIY Ideas for a Greener Home”! This is a fantastic way to blend creativity with environmental responsibility, as highlighted by many recent resources. The trend towards eco-friendly DIY is clearly growing, with numerous articles and blogs dedicated to it, including those from Go Green Zero, The Elegant Aesthetic, Crafthought, Crazy Laura, DIY Craft, Atelho, and Whipperberry.
Let’s delve into this concept with more detail, focusing on five actionable and impactful DIY ideas that will help you create a more sustainable and beautiful home.
Crafts That Care: 5 Sustainable DIY Ideas for a Greener Home
Embracing a greener lifestyle doesn’t necessitate drastic overhauls or expensive purchases. As many sources like Crafthought and DIY Craft suggest, eco-friendly DIY and sustainable crafting empower individuals to make a positive impact on the planet while expressing their creativity. By transforming everyday waste into beautiful treasures, as The Elegant Aesthetic beautifully puts it, we can foster a more conscious and sustainable way of living.
Here are five detailed sustainable DIY ideas that you can implement to infuse your home with both charm and eco-consciousness:
1. Upcycled Fabric Tote Bags: Ditch the Plastic, Embrace the Stylish
The Concept: Single-use plastic bags contribute significantly to landfill waste and ocean pollution. Creating your own reusable tote bags from old clothing, linens, or fabric scraps is a simple yet impactful way to combat this. This project taps into the upcycling trend, turning discarded textiles into functional and fashionable items.
Why it’s Sustainable:
- Waste Reduction: Diverts textiles from landfills.
- Resource Conservation: Reduces the need for new materials and the energy involved in their production.
- Durability: Well-made fabric totes can last for years, further minimizing waste.
Detailed Implementation & Analysis:
- Materials: Old t-shirts, pillowcases, jeans, curtains, or even sturdy shopping bags that have seen better days. Ensure the fabric is clean and free from excessive wear or holes.
- Tools: Sewing machine (or needle and thread for a no-sew option), scissors, fabric chalk or marker, pins.
- Process:
- Select Fabric: Choose a durable and attractive fabric. T-shirts offer a soft, flexible option, while denim or canvas provides more structure.
- Cut Pattern: For a simple tote, cut two identical rectangular pieces for the bag body and two long strips for the handles. A good starting point for the body is 15×17 inches, and handles can be around 3×20 inches.
- Sew Body: Pin the two body pieces right sides together and sew along the sides and bottom, leaving the top open. For added durability, consider a double stitch or zigzag stitch.
- Create Handles: Fold each handle strip lengthwise, right sides together, and sew along the long edge. Turn them right side out.
- Attach Handles: Fold down the top edge of the bag body twice to create a clean hem. Pin the raw ends of the handles to the inside of this hem, ensuring they are evenly spaced and facing inwards. Sew the hem, securing the handles in place.
- Reinforce: For heavier loads, reinforce the handle attachment points with extra stitching.
- Creative Touches: Embellish with fabric paint, embroidery, patches from other old garments, or even appliqué. Mix and match fabric types for a unique patchwork design.
- Impact: Every time you use your handmade tote, you’re making a conscious choice against disposable alternatives. It’s a visible statement of your commitment to sustainability. This aligns with the “zero-waste home” goals mentioned by Go Green Zero.
2. Seed Bombs: Cultivating Biodiversity, One Ball at a Time
The Concept: Seed bombs are small balls of clay, compost, and wildflower seeds. When tossed into neglected or barren areas, they can sprout into a riot of color and life, supporting pollinators and enriching the local ecosystem. This project is a delightful way to engage with nature and contribute to environmental restoration.
Why it’s Sustainable:
- Habitat Creation: Provides food and shelter for bees, butterflies, and other beneficial insects.
- Beautification: Transforms drab urban spaces into vibrant green areas.
- Pollinator Support: Crucial for a healthy ecosystem, and wildflower meadows are vital for their survival.
Detailed Implementation & Analysis:
- Materials:
- Clay: Air-dry clay (found at craft stores) or even natural clay from your garden (ensure it’s free of contaminants).
- Compost/Soil: Good quality, nutrient-rich compost or potting soil.
- Seeds: Native wildflower seeds are best. Avoid invasive species. A mix of annuals and perennials will provide blooms throughout the season and in subsequent years.
- Water: Just enough to bind the ingredients.
- Tools: Mixing bowl, gloves (optional, as the mixture can be sticky), tray for drying.
- Process:
- Mix Dry Ingredients: Combine roughly 5 parts clay, 3 parts compost/soil, and 1 part seeds in a bowl. The ratio can be adjusted based on the stickiness of your clay.
- Add Water: Gradually add small amounts of water, mixing thoroughly until you achieve a workable dough-like consistency. It should hold its shape when rolled into a ball but not be too wet or crumbly.
- Form Balls: Take small portions of the mixture and roll them into compact balls, about the size of a large marble or golf ball. Ensure the seeds are well-distributed within the ball.
- Dry: Place the seed bombs on a tray lined with parchment paper and let them air dry completely. This can take a few days depending on humidity. Store them in a cool, dry place until ready to use.
- Creative Touches: You can add a bit of natural food coloring to the clay for visual appeal, though this is purely aesthetic. The primary beauty comes from the resulting blooms.
- Impact: Seed bombs are a gentle yet effective way to reintroduce native flora. They are particularly useful in urban environments where green spaces are scarce. This project embodies the “making a positive impact on our planet” ethos described by Crafthought.
3. Reclaimed Wood Wall Art or Shelving: Rustic Charm, Sustainable Structure
The Concept: Old pallets, discarded furniture, or salvaged lumber can be transformed into striking pieces of wall art or functional shelving. This approach not only gives new life to materials that would otherwise be waste but also adds a unique, character-filled aesthetic to your home.
Why it’s Sustainable:
- Resourcefulness: Utilizes materials destined for landfill or incineration.
- Reduced Carbon Footprint: Avoids the energy and emissions associated with producing new wood.
- Unique Aesthetic: Reclaimed wood often has a beautiful patina and history that new wood lacks.
Detailed Implementation & Analysis:
- Materials: Reclaimed wood (pallets, old fence boards, furniture pieces), screws or nails, wood glue, sandpaper, wood sealant or natural oil finish.
- Tools: Saw (hand saw, jigsaw, or miter saw), drill, screwdriver, measuring tape, level, safety glasses, dust mask.
- Process (for Wall Art Example):
- Source Wood: Carefully disassemble any pallets or furniture, ensuring you remove all nails and staples. Wear safety glasses and gloves.
- Prepare Wood: Sand the wood to remove splinters and rough edges. You can choose to preserve the weathered look or sand it smoother, depending on your desired aesthetic. Clean the wood thoroughly.
- Design: Plan your arrangement. You could create geometric patterns, a mosaic-like effect, or a simple arrangement of boards.
- Cut to Size: Cut the wood pieces to your desired dimensions based on your design.
- Assemble: Arrange the pieces according to your design. You can attach them to a backing board (also reclaimed wood!) for stability, or directly to each other using wood glue and screws/nails.
- Finish: Apply a natural wood sealant or oil (like linseed oil or tung oil) to protect the wood and enhance its natural beauty. Avoid varnishes that can off-gas.
- Creative Touches: Incorporate different wood types, textures, and colors for a dynamic piece. You can also add painted elements or other found objects. For shelving, consider unique bracket designs using repurposed metal or sturdy rope.
- Impact: This DIY adds significant visual interest and a story to your home. It’s a tangible representation of reducing waste and embracing circularity in your decor, fitting the “chic, sustainable living” ideal mentioned by Crazy Laura.
4. Mason Jar Herb Garden/Storage: Freshness in a Jar, Organized and Sustainable
The Concept: Mason jars are incredibly versatile. They can be repurposed as stylish containers for a small indoor herb garden, or for storing pantry staples like grains, nuts, and spices. This not only reduces your reliance on single-use plastic packaging but also brings a touch of rustic charm and freshness into your kitchen.
Why it’s Sustainable:
- Reusability: Glass jars are infinitely reusable.
- Waste Reduction: Eliminates the need for plastic containers and bags for storage.
- Reduced Food Waste: Transparent jars allow for easy monitoring of contents, preventing spoilage.
- Fresh Ingredients: Growing your own herbs reduces the carbon footprint associated with transporting produce.
Detailed Implementation & Analysis:
- Materials: Clean glass jars (Mason jars, jam jars, pickle jars), lids, potting soil, small stones or gravel (for drainage), herb seeds or seedlings, pantry staples (grains, pasta, dried beans, spices, nuts).
- Tools: Small trowel or spoon, watering can.
- Process (for Herb Garden):
- Prepare Jar: Ensure the jar is thoroughly cleaned.
- Drainage Layer: Add a layer of small stones or gravel to the bottom of the jar (about 1-2 inches). This is crucial for preventing waterlogged roots.
- Soil Layer: Fill the jar with good quality potting soil, leaving enough space for your seedling or seeds.
- Planting: Gently plant your herb seedling or sow seeds according to packet instructions.
- Watering: Water lightly. The key is to not overwater, as there’s no drainage hole. Monitor soil moisture and water only when the top inch feels dry.
- Placement: Place your jar in a sunny spot on a windowsill.
- Process (for Pantry Storage):
- Clean and Dry: Thoroughly wash and dry your jars and lids.
- Fill: Fill the jars with your chosen pantry items.
- Seal: Screw on the lids tightly.
- Creative Touches: Label your jars with chalk markers or decorative paper tags. You can paint the lids or add fabric covers. For herb gardens, consider using decorative jars or tying twine around them.
- Impact: This DIY promotes a more organized, visually appealing, and less wasteful kitchen. It encourages a connection to fresh ingredients and a mindful approach to food storage, aligning with the “zero-waste practices in the kitchen” mentioned by Crafthought.
5. Upcycled Tin Can Lanterns: Ambient Light, Eco-Friendly Glow
The Concept: Empty tin cans can be transformed into beautiful and atmospheric lanterns. By punching holes in various patterns, you can create intricate designs that cast mesmerizing light and shadows when a candle or LED light is placed inside. This is a charming way to add ambiance to your outdoor spaces or living areas.
Why it’s Sustainable:
- Metal Recycling: Gives a new purpose to a common recyclable material.
- Reduced Energy Consumption: Primarily uses candles or low-energy LEDs for illumination.
- Aesthetic Appeal: Creates a warm and inviting atmosphere without the need for new lighting fixtures.
Detailed Implementation & Analysis:
- Materials: Clean tin cans (food cans, coffee cans – remove labels and any sharp edges), hammer, nails of various sizes (or a drill with various drill bits), sturdy surface to work on (like a thick piece of wood), candle or LED tea light.
- Tools: Pliers (for removing labels and smoothing edges), gloves, safety glasses.
- Process:
- Prepare Can: Remove labels and wash the can thoroughly. Ensure there are no sharp edges; you can carefully file them down with sandpaper or pliers.
- Design: Draw or trace your desired pattern onto the can with a marker. Simple dots, lines, geometric shapes, or even more intricate designs work well.
- Punch Holes: Place the can on a sturdy surface. Using a hammer and a nail of your chosen size, carefully punch holes along your design lines. Varying nail sizes can create different light intensities and effects. For intricate patterns, a drill with small bits can be more precise.
- Safety: Wear gloves and safety glasses to protect yourself from sharp edges and flying debris.
- Finish: You can leave the cans as they are for a rustic look, or you can paint them with high-heat spray paint suitable for metal if you want a different color.
- Illumination: Place a candle or an LED tea light inside the can. For candles, ensure the can is stable and on a heat-resistant surface, and never leave a burning candle unattended.
- Creative Touches: Use different sized cans for varied heights and light patterns. Create themed lanterns for holidays or special occasions. You can also add a handle made from wire for hanging.
- Impact: These lanterns offer a magical and eco-friendly way to illuminate your home and garden. They embody the spirit of transforming “everyday waste into beautiful treasures” as described by The Elegant Aesthetic, adding a touch of handmade magic.
Conclusion: Crafting a Greener Future, One Project at a Time
These five DIY ideas represent just a fraction of the possibilities for creating a more sustainable home through crafting. As the resources from Go Green Zero, Crafthought, and Crazy Laura emphasize, eco-friendly DIY is about more than just saving money; it’s about mindful consumption, waste reduction, and a deeper connection with our environment.
By embracing these “Crafts That Care,” you’re not only enhancing the beauty and functionality of your living space but also actively contributing to a greener, healthier planet. Each stitch, each upcycled item, and each planted seed is a step towards a more sustainable future, proving that creativity and environmental responsibility can go hand-in-hand. As Whipperberry notes, these projects can teach valuable skills and conservation principles, making them enriching experiences for individuals and families alike.